Gaeldeth wrote:I think I'm just put off a bit by the price tag on them and trying to figure out exactly what molds I need for my use so no money wasted on getting wrong ones.
Same as most I've seen I am wanting this to make dungeon walls, floors and doors for a custom hero quest board. Any advise on what mold would help me would be greatly apprechiated. Thanks
Here is your shopping list. Doing things cheap is the only way I can afford to have any fun, so this is not a blatant recommendation, its a testimonial essaying which molds that I have personally used with great success. The molds are incredibly precise, and take most of the work out of building good-looking terrain.
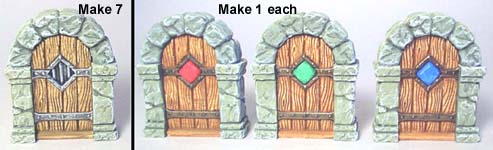
A Note About Doors: I have experimented with using custom-made doors, but always wind up falling back into using the originals. The amount of work involved is arduous, beyond even dozens of castings of floor-tile molds. The most ideal doors take multiple castings of many parts, and are difficult to level off so that they stand upright unless you take the utmost care in their making.
Cracked Floor Tiles (Mold #203) $29.00
Firstly, this mold is dead-on for Heroquest's most oft-used tile-form, the hallways. Also, its a great tile for fantasy anything. I have made
thousands of tiles from the two of these that I own.
or
Worn Floor Tiles (Mold #206) $29.00
If you own a miter box and a razor saw, this is the only floor mold you'll need (but that would be hard). You can use miter box to custom-carve each square--its not that difficult to do.
Stone Arch Wall (Mold #88) $34.00
This guy, here, is exactly what you need if you want walls and a door for a board-game. It was designed to be used to make Dungeon Twister tiles. It has a simple door, does not require much piece-assembly, and it is, without a doubt, the easiest door to get flush with the wall pieces. Here is a tut by Bruce on it:
http://www.hirstarts.com/tips25/tips25.htmlFlagstone Floor Tile (Mold #260) $29.00
This one can best account for the flagstone squares on hte HQ board, which are the second most-used.
Three of the above molds will get you your Heroquest board.
Must-buy list of supplies:
Plaster-of-Paris (You can use better materials--dental plaster like hydrocal white or Merlin's Magic, but they are really expensive, and they're not that much better than regular plaster-of-paris if you take care of your possessions)
3.5" Paint Scraper
Bottle of Jet-Dry
Tacky Glue (and nothing else)
Plastic basin (for soaking molds between castings; add a squirt of Jet-Dry to the water)
Plastic spoons
Plastic cups
PAPER TOWELS
Dedicated trash can
A SHARP hobby knife (have extra blades--they dull quickly and a dull blade can frustrate the simplest jobs)
A "right" angle, at least 1" tall, though preferably taller than you want your walls to be. Legos work well.
If modular, use 2mm or 3mm foam rubber sheets as mounting.
If redacted, buy an overlarge sheet of something flat and sturdy. Buy cheap, wooden molding from a hobby store. Mold the right angle, and build the board within the molding.

This here is a board I started (and abandoned) using molding. I did not use Hirst blocks, rather these 3mm ones made for Heroquest by this couple in Germany. The bricks were not flush together, so I basically wasted $100 on those German molds, and another $200 on resin that my stupid-ass thought would be worth it.
Never use soap on your molds, it films up on them, and ruins their next casting, no matter what.
Basically, fill up 1/4 of a cup with water. Add powder a spoonful at a time; do not stir, only pour. Whenever you add powder to the water, you will see the powder osmose. You will have added enough powder when you can clearly distinguish the accumulated powder just below the surface of the water--basically, once it stops sinking into the water after you dump it in.
Stir with a separate spoon until pancake-battery in viscosity. Line up the molds you want to cast. Add spoonfulls of mixture into the cavities of the molds--you can take your time. Each time you put the spoon back inside the cup, stir once before taking more mixture out. You want to slightly overfill each cavity.
Take the paint-scraper and sort of tap the top of the mold a few times to shake out air bubbles. Then smooth over the tops--sometimes water will separate from the cavities and will need to be wiped off. Take excess mixture scraped off of each mold, and add it to the next--you don't want to waste usable resources.
Nurse them for the first couple minutes--keep scraping them until they are flush and perfect-looking.
Wait.
When they look dry (about 20 mins) tap the back of a brick with your fingernail, it that does not leave a mark, they're ready to pull.
The molds are flexible, so bend them away from bricks to remove them. If you try to pull the bricks out, they may break.
The bricks won't be very useful for hard work for about 12 hours. Set them out in the sun or something; or wherever, so they can fully cure. You can bake them in the oven for fast curing, but it makes them stink.


 by Gaeldeth » July 7th, 2013, 6:00 am





 This here is a board I started (and abandoned) using molding. I did not use Hirst blocks, rather these 3mm ones made for Heroquest by this couple in Germany. The bricks were not flush together, so I basically wasted $100 on those German molds, and another $200 on resin that my stupid-ass thought would be worth it.