I've got 4 questions on Quest 12, as I'm about to play this with the Dwarf:
1.) The traps in hallway I cannot be detected unless the hero has a lantern. As you're playing this as a faithfully close representation of the books, I'd like to remind you in the Fellowship of Four the Dwarf does have night vision. I wouldn't argue the point with any other hero, so I was wondering if we could let it slide for the Dwarf?
2.) And since this hall is extremely dark, does that also imply that the brick wall marking the end of Room K cannot be detected until the hero runs into it?
3.) The falling block traps in rooms J will collapse on Zargon's turn if the hero doesn't search. Can they be disarmed?
4.) Also, if the hero doesn't search for the J traps do all of them collapse on Zargon's turn or just the ones the hero moves under? This, in essence, could lead to the hero being permanently stuck in the tomb.
-
- Advertisement
Make a small donation to Ye Olde Inn!
Every cent received goes toward Ye Olde Inn's maintenance and allows us to continue providing the best resources for HeroQuest and Fantasy Gaming fans.
The Tyrant's Tomb - a solo quest pack
- wallydubbs
Halberdier
- Posts: 1342
- Joined: October 18th, 2018, 7:15 am
- Forum Language: English (United States)
- Evil Sorcerer: Zargon
- Usergroups:


Advertisement
Make a small donation to Ye Olde Inn!
Every cent received goes toward Ye Olde Inn's maintenance and allows us to continue providing the best resources for HeroQuest and Fantasy Gaming fans.
Re: The Tyrant's Tomb - a solo quest pack
![]() by Pancho » August 13th, 2020, 2:52 am
by Pancho » August 13th, 2020, 2:52 am
wallydubbs wrote:I've got 4 questions on Quest 12, as I'm about to play this with the Dwarf:
1.) The traps in hallway I cannot be detected unless the hero has a lantern. As you're playing this as a faithfully close representation of the books, I'd like to remind you in the Fellowship of Four the Dwarf does have night vision. I wouldn't argue the point with any other hero, so I was wondering if we could let it slide for the Dwarf?
2.) And since this hall is extremely dark, does that also imply that the brick wall marking the end of Room K cannot be detected until the hero runs into it?
3.) The falling block traps in rooms J will collapse on Zargon's turn if the hero doesn't search. Can they be disarmed?
4.) Also, if the hero doesn't search for the J traps do all of them collapse on Zargon's turn or just the ones the hero moves under? This, in essence, could lead to the hero being permanently stuck in the tomb.
1. I did remember that the Dwarf had night vision in the book, and was in two minds about whether to include that ability. Night vision in animals still requires some light, even if it is minuscule, and some of the rooms in this pack technically have no light in them at all, for natural or in some cases magical reasons. But I think we should go with what makes the best quest, and the best adventure, and I agree that we should give the Dwarf a break for this quest. I’ll have to look through the previous quests to see if we should let the various darkness rules slide for the dwarf there too, the room with the stone creatures, the magic room in quest 9 etc.
2. Sure, feel free to not give any info on what’s in the corridor at all. Unless you’re using the dwarf of course
3 & 4. I should clear this up in the notes as it’s very important, but the only way that all the falling blocks fall is if the Hero walks through the weakened doorway without first searching for traps. A trap search reveals that the tons of ice have left the roof in a very precarious shape, and any pressure on the doorway at all will bring it down. The traps themselves cannot be disarmed, but the Hero can just walk through safely once armed with this knowledge, and maybe use it to his advantage later on...
Rewards:
 Miniature Exchanges.")
-

Pancho
Rock Skin Achieved
Halberdier- Posts: 1277
- Joined: April 12th, 2017, 10:43 am
- Forum Language: British English
- Hero:

- Evil Sorcerer: Morcar
- Usergroups:


Playtest Quest 12 The Tyrant's Tomb
![]() by wallydubbs » August 14th, 2020, 8:54 pm
by wallydubbs » August 14th, 2020, 8:54 pm
I decided to play this one with the Dwarf. Since the Barbarian's failure I went ahead and added 250 gold to the Dwarf's wallet, as would be the result had the heroes found the 1000 gold in the last quest it would've been divided up equally among the heroes.
The the Dwarf, starting this quest had bought a Potion of Healing, Mongoose Statue and Shovel.
Here's how he fared:
Upon stepping through the door the immediately searched for traps, spotting the one far down the hall in front of the 3x4 room. He headed that way but came into view of the two
  s in the hall. He ran up to the first, attacking with Skullcleaver, rolling:
  , but rerolled and got
 , killing the first . The other attacked, but it's strike was blocked. finished it off on his next turn.
While he was there, the made a search of that hall, finding nothing of interest. He headed back and disarmed the spear trap before entering the room and facing the Rime Wolf. The flopped on his initial attack, but managed 1 on his reroll.
However the Rime Wolf managed a in defense.
Surprisingly brutal, the Rime Wolf attacked with !
Equally impressive was the's defense: . Only taking 1BP of damage.
The flopped once again, but couldn't outrun the beast, so he took the attack: , but was able to block it.
landed 1 hit on his next attack but it wasn't enough to kill the wolf.
The wolf attacked with
Again, rolled 3 s!
He finally rolled doubles and got the kill. A search of the room and he found a Potion of Magic Resistance.
Leaving the room he headed to the Eastern hall. Into the first room with 2 s he rolled , but thanks to Skullcleaver's ability he rerolled to , killing the first .
The 2nd one attacked:
This time only rolled , taking 2 more damage.
got retribution on his next turn, rolling , taking out the 2nd .
No traps or secret doors were found in that room, but he rid find Jewels worth 50 gold.
Into the adjacent room with 2 mores, flopped again. Skullcleaver picked up the slack getting 1 on his reroll. However the was able to block it, resulting in two attacks against the .
The blocked the first attack, but the 2nd one was . However managed 2 s in defence, dropping to 3BP.
managed a kill on his next turn, but couldn't outrun the other . Fortunately he blocked the next attack and managed to finish it off on his next turn.
Some trap, secret door and treasure searches later brought forth a Wandering monster. The rolled .
Uncannily pulled off another 3 of a kind !
He would quell the on his next turn.
Rolling
 only got him enough space to turn to the middle hall, but not enough to reach the next
managed to block and kill the thanks to Skullcleaver. (Skullcleaver is really coming in handy!)
Onto the room with the 3s. He was able to take them all out in 3 turns, however, 1 did manage a hit on him, taking him down to 2BP.
He then found no traps, but discovered the secret door and the treasure deck revealed a Potion of Warmth.
Then came the fight with the Troll. Is initial attack flopped, but Skullcleaver again, made the save, getting on his reroll, immediately taking the Troll down to 1BP.
Although the Troll rolled
got two more s and only took 1 damage, which brought him down to 1 BP.
attacked again, this time getting 1 , but the troll had two among his defense.
The managed a 
 on movement and avoided another attack from the troll.
As the Troll failed to catch him, he charged back with a fierce attack, getting . The troll was unable to block and was beaten by the .
Backtracking to chest the discovered the bone key and carefully headed back, checking for traps at every turn. He successfully disarmed the other spear trap and pushed forward to the room in the west side of the board with the two .
He killed the first thanks to Skullcleaver again, the other attacked:
fired back with .
The fired back with , while the defended with . This killed the , so he had to use that Potion of Healing, bringing him back up to 4BP. He'd kill the on his next turn.
A thorough search revealed no traps or secret doors, but a Hazard from the treasure deck... so maybe it wasn't so thorough.
Heading to the next room, he searched for traps and spotted the two pit traps and successfully disarmed them, he search for doors and treasure, drawing a poison card, thus rolling a and losing 1 mind point.
Rolling  , he made it into the room but couldn't get near enough to attack Ghushlag. She immediately cast Strands of Binding on him. However the immediately cut himself free on his next turn, rolling .
Having just used his action to free himself he decided to get some distance from her to avoid an attack. She followed but could not reach him and thus cast Firestorm. Luckily the had a Potion of Magic Resistance and avoided any damage.
attacked with
Ghushlag defended: , losing 1BP. She then attacked with
defended with , taking no damage.
The's next attack brought on two s.
Ghushlag defended with and was killed.
Hoping for a Potion of Healing, the searched Ghushlag's room, finding the secret door and gem tucked into an old boot.
The then decided to check the small room before going through the secret door. He found 15 more gold in there.
Through the secret door he did indeed search for traps. Disarming the one on the chest he rolled, and then again in the cupboard, finding the Genie scroll, the Potion of Healing, the map and Journey bag.
After using the Journey Bag he searched the snow cavern, discovering the other boot, which another gem tucked into it. He also found the secret door and checked fir traps through the hallway, finding none.
Finding the entrance to the pyramid the used his Pick Axe and shovel to clear away the ice.
In Room G he finds the tablets but decides not to take them with him as they are too heavy.
In Room H he draws a Wandering Monster from the treasure deck, triggering a spear trap, but in rolling he avoids taking damage. Faced with the Stone doorway dilemma, the opts for exhaustion and burrows through the stone doorway way his pick axe. So he drinks a Potion of Warmth to nullify the lost body point.
In the next room he found no traps or secret doors, but did find a Treasure Horde (Hoard) from the deck (100 gold).
Through hallway I he fell into two Pits of Darkness, down to 1BP... however if he could see in the dark (which I think he should be able to) all traps would've successfully been disarmed (:whiteshield:,, , ).
In the J rooms he searched for traps as soon as he entered, discovering the falling block traps he proceeded carefully, searching for treasure along the way, finding 20 more gold and a Hazard, dropping to 0 or 2BP. One would result in using the Potion of Healing.
Before entering room K the last treasure search provided a Potion of Speed.
When facing Chungor Chan I played this 3 separate ways, so you can choose whichever ending you see fit:
1.) the first checks to see if the Mongoose Statue has any effect on the Tyrant, which it does, and the Mongoose familiar fights the Snake as the  gets away with all the gold.
2.) The summons his Genie to attack the tyrant, attacking with , which has no effect.
Chungor Chan then summons a Draugr, which then attacks the with
The drops to 2 or 0 BP after rolling in defense. He would need that Potion of Healing if he still has it.
On his next attack, won't cut it but Skullcleaver allows him to reroll: . Unfortunately the Draugr had 2 s in defense.
Draugr attacks with
defends: , dropping him to 1 or 3 BP.
flops on his next attack and runs to the previous room, out of the Draugr's reach.
His next attack is
Draugr defends with , taking 1Bp of damage.
Draugr attacks:
defends: , dying where he stands.
3.) He survived with 2BP
gets a 2nd hit on his next attack.
Draugr then rolls 3 skulls, but managed 2 , taking himndown to 1 BP.
attacks with 2 s, but the Draugr defended with 1 . Both down to 1BP.
has movement and manages to keep distance between himself and the Draugr before running back and taking the Draugr down to 0BP with .
At which point Chungor Chan attempts to throw the into the void. On a roll for mind points the rolls and is tossed into the Void.
Only one of these options does the win.
The the Dwarf, starting this quest had bought a Potion of Healing, Mongoose Statue and Shovel.
Here's how he fared:
Upon stepping through the door the
immediately searched for traps, spotting the one far down the hall in front of the 3x4 room. He headed that way but came into view of the two s in the hall. He ran up to the first, attacking with Skullcleaver, rolling: , but rerolled and got , killing the first . The other attacked, but it's strike was blocked. finished it off on his next turn.While he was there, the
made a search of that hall, finding nothing of interest. He headed back and disarmed the spear trap before entering the room and facing the Rime Wolf. The flopped on his initial attack, but managed 1 on his reroll.However the Rime Wolf managed a
in defense.Surprisingly brutal, the Rime Wolf attacked
with !Equally impressive was the
's defense: . Only taking 1BP of damage.The
flopped once again, but couldn't outrun the beast, so he took the attack: , but was able to block it. landed 1 hit on his next attack but it wasn't enough to kill the wolf.The wolf attacked with
Again,
rolled 3 s!He finally rolled double
s and got the kill. A search of the room and he found a Potion of Magic Resistance.Leaving the room he headed to the Eastern hall. Into the first room with 2
s he rolled , but thanks to Skullcleaver's ability he rerolled to , killing the first .The 2nd one attacked:
This time
only rolled , taking 2 more damage. got retribution on his next turn, rolling , taking out the 2nd .No traps or secret doors were found in that room, but he rid find Jewels worth 50 gold.
Into the adjacent room with 2 more
s, flopped again. Skullcleaver picked up the slack getting 1 on his reroll. However the was able to block it, resulting in two attacks against the .The
blocked the first attack, but the 2nd one was . However managed 2 s in defence, dropping to 3BP. managed a kill on his next turn, but couldn't outrun the other . Fortunately he blocked the next attack and managed to finish it off on his next turn.Some trap, secret door and treasure searches later brought forth a Wandering monster. The
rolled .Uncannily
pulled off another 3 of a kind !He would quell the
on his next turn.Rolling
only got him enough space to turn to the middle hall, but not enough to reach the next managed to block and kill the thanks to Skullcleaver. (Skullcleaver is really coming in handy!)Onto the room with the 3
s. He was able to take them all out in 3 turns, however, 1 did manage a hit on him, taking him down to 2BP.He then found no traps, but discovered the secret door and the treasure deck revealed a Potion of Warmth.
Then came the fight with the Troll. Is initial attack flopped, but Skullcleaver again, made the save, getting
on his reroll, immediately taking the Troll down to 1BP.Although the Troll rolled
got two more s and only took 1 damage, which brought him down to 1 BP. attacked again, this time getting 1 , but the troll had two among his defense.The
managed a on movement and avoided another attack from the troll.As the Troll failed to catch him, he charged back with a fierce attack, getting
. The troll was unable to block and was beaten by the .Backtracking to chest the
discovered the bone key and carefully headed back, checking for traps at every turn. He successfully disarmed the other spear trap and pushed forward to the room in the west side of the board with the two .He killed the first
thanks to Skullcleaver again, the other attacked: fired back with .The
fired back with , while the defended with . This killed the , so he had to use that Potion of Healing, bringing him back up to 4BP. He'd kill the on his next turn.A thorough search revealed no traps or secret doors, but a Hazard from the treasure deck... so maybe it wasn't so thorough.
Heading to the next room, he searched for traps and spotted the two pit traps and successfully disarmed them
, he search for doors and treasure, drawing a poison card, thus rolling a and losing 1 mind point.Rolling
, he made it into the room but couldn't get near enough to attack Ghushlag. She immediately cast Strands of Binding on him. However the immediately cut himself free on his next turn, rolling .Having just used his action to free himself he decided to get some distance from her to avoid an attack. She followed but could not reach him and thus cast Firestorm. Luckily the
had a Potion of Magic Resistance and avoided any damage. attacked with Ghushlag defended:
, losing 1BP. She then attacked with defended with , taking no damage.The
's next attack brought on two s.Ghushlag defended with
and was killed.Hoping for a Potion of Healing, the
searched Ghushlag's room, finding the secret door and gem tucked into an old boot.The then decided to check the small room before going through the secret door. He found 15 more gold in there.
Through the secret door he did indeed search for traps. Disarming the one on the chest he rolled
, and then again in the cupboard, finding the Genie scroll, the Potion of Healing, the map and Journey bag.After using the Journey Bag he searched the snow cavern, discovering the other boot, which another gem tucked into it. He also found the secret door and checked fir traps through the hallway, finding none.
Finding the entrance to the pyramid the
used his Pick Axe and shovel to clear away the ice.In Room G he finds the tablets but decides not to take them with him as they are too heavy.
In Room H he draws a Wandering Monster from the treasure deck, triggering a spear trap, but in rolling
he avoids taking damage. Faced with the Stone doorway dilemma, the opts for exhaustion and burrows through the stone doorway way his pick axe. So he drinks a Potion of Warmth to nullify the lost body point.In the next room he found no traps or secret doors, but did find a Treasure Horde (Hoard) from the deck (100 gold).
Through hallway I he fell into two Pits of Darkness, down to 1BP... however if he could see in the dark (which I think he should be able to) all traps would've successfully been disarmed (:whiteshield:,
, , ).In the J rooms he searched for traps as soon as he entered, discovering the falling block traps he proceeded carefully, searching for treasure along the way, finding 20 more gold and a Hazard, dropping to 0 or 2BP. One would result in using the Potion of Healing.
Before entering room K the last treasure search provided a Potion of Speed.
When facing Chungor Chan I played this 3 separate ways, so you can choose whichever ending you see fit:
1.) the
first checks to see if the Mongoose Statue has any effect on the Tyrant, which it does, and the Mongoose familiar fights the Snake as the 2.) The
summons his Genie to attack the tyrant, attacking with , which has no effect.Chungor Chan then summons a Draugr, which then attacks the
with The
drops to 2 or 0 BP after rolling in defense. He would need that Potion of Healing if he still has it.On his next attack,
won't cut it but Skullcleaver allows him to reroll: . Unfortunately the Draugr had 2 s in defense.Draugr attacks with
defends: , dropping him to 1 or 3 BP. flops on his next attack and runs to the previous room, out of the Draugr's reach.His next attack is
Draugr defends with
, taking 1Bp of damage.Draugr attacks:
defends: , dying where he stands.3.) He survived with 2BP
gets a 2nd hit on his next attack.Draugr then rolls 3 skulls, but
managed 2 , taking himndown to 1 BP. attacks with 2 s, but the Draugr defended with 1 . Both down to 1BP. has movement and manages to keep distance between himself and the Draugr before running back and taking the Draugr down to 0BP with .At which point Chungor Chan attempts to throw the
into the void. On a roll for mind points the rolls and is tossed into the Void.Only one of these options does the
win.Rewards:

- wallydubbs
Halberdier- Posts: 1342
- Joined: October 18th, 2018, 7:15 am
- Forum Language: English (United States)
- Evil Sorcerer: Zargon
- Usergroups:
Re: The Tyrant's Tomb - a solo quest pack
![]() by lestodante » August 15th, 2020, 11:29 am
by lestodante » August 15th, 2020, 11:29 am
Pancho did you see my PM?

Rewards:
 Miniature Exchanges.")
 Miniature Exchanges.")

-

lestodante
Yeti
- Posts: 2705
- Images: 5
- Joined: January 7th, 2017, 9:40 am
- Location: Italy
- Forum Language: English (United States)
- Hero:
- Evil Sorcerer: Morcar
- Usergroups:
Re: The Tyrant's Tomb - a solo quest pack
![]() by Pancho » August 15th, 2020, 2:10 pm
by Pancho » August 15th, 2020, 2:10 pm
lestodante wrote:Pancho did you see my PM?
Only just saw it, reply sent now.
Rewards:
-
Pancho
Rock Skin Achieved
Halberdier- Posts: 1277
- Joined: April 12th, 2017, 10:43 am
- Forum Language: British English
- Hero:
- Evil Sorcerer: Morcar
- Usergroups:
Re: The Tyrant's Tomb - a solo quest pack
![]() by Pancho » August 15th, 2020, 2:36 pm
by Pancho » August 15th, 2020, 2:36 pm
I’m more than happy for the dwarf to not be affected by the darkness in this quest. I’ll change the notes for it once I’ve had a chance to check for similar situations in the other quests that might also change.
I think it’s also OK that this quest is very hard. I’m happy for the player to fail with each Hero but get closer each time by benefiting from knowledge of the quest layout etc.
Rewards:
-
Pancho
Rock Skin Achieved
Halberdier- Posts: 1277
- Joined: April 12th, 2017, 10:43 am
- Forum Language: British English
- Hero:
- Evil Sorcerer: Morcar
- Usergroups:
Re: The Tyrant's Tomb - a solo quest pack
![]() by lestodante » October 18th, 2020, 1:04 pm
by lestodante » October 18th, 2020, 1:04 pm
Hey Pancho, should we finish this pack?
Anything still missing or to fix?
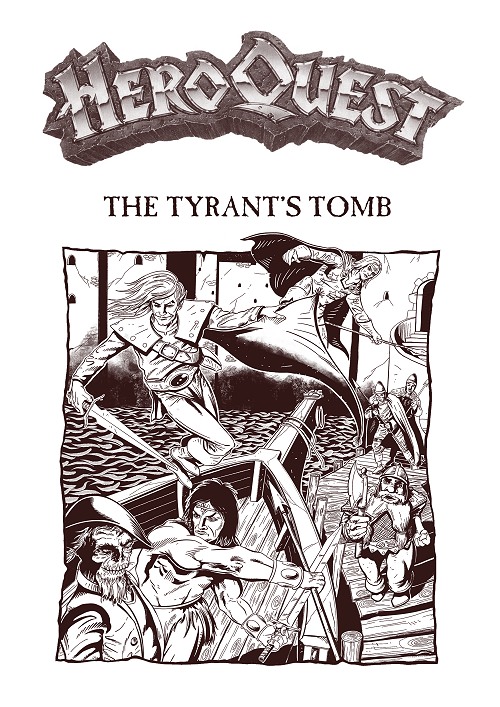
Here is a cover artwork for the questpack! The drawing is a free gift to the HeroQuest community painted by Laszlo Seber (aka BabyRhino Art)!
It represents some moments taken from the stories: Wizard and Elf are on the flying carpet after defeating the Cabiris, the Barbarian on the ship facing the ghost captain and the Dwarf escaping from Runeport with two guards stalking him.
Anything still missing or to fix?
Here is a cover artwork for the questpack! The drawing is a free gift to the HeroQuest community painted by Laszlo Seber (aka BabyRhino Art)!
It represents some moments taken from the stories: Wizard and Elf are on the flying carpet after defeating the Cabiris, the Barbarian on the ship facing the ghost captain and the Dwarf escaping from Runeport with two guards stalking him.
Rewards:
-
lestodante
Yeti- Posts: 2705
- Images: 5
- Joined: January 7th, 2017, 9:40 am
- Location: Italy
- Forum Language: English (United States)
- Hero:
- Evil Sorcerer: Morcar
- Usergroups:
Re: The Tyrant's Tomb - a solo quest pack
![]() by Pancho » October 18th, 2020, 2:22 pm
by Pancho » October 18th, 2020, 2:22 pm
My jaw is on the floor for how good that cover is 
It makes the whole project come together so well. Thanks guys
It makes the whole project come together so well. Thanks guys
Rewards:
-
Pancho
Rock Skin Achieved
Halberdier- Posts: 1277
- Joined: April 12th, 2017, 10:43 am
- Forum Language: British English
- Hero:
- Evil Sorcerer: Morcar
- Usergroups:
Re: The Tyrant's Tomb - a solo quest pack
![]() by Pancho » October 18th, 2020, 2:27 pm
by Pancho » October 18th, 2020, 2:27 pm
So what’s left to do?
- More playtesting is always good but I think we’re OK if we don’t get anymore, as Wallydubs has done a lot on that front.
- I want to redo the map to make it better.
- we still need the large coast tile.
- and Heroscribe maps for all 12 quests.
- the intro needs reworking to mention the rules for splitting the Elf spells into your 3 new decks.
- acknowledgements.
I think that’s it?
Rewards:
-
Pancho
Rock Skin Achieved
Halberdier- Posts: 1277
- Joined: April 12th, 2017, 10:43 am
- Forum Language: British English
- Hero:
- Evil Sorcerer: Morcar
- Usergroups:
Re: The Tyrant's Tomb - a solo quest pack
![]() by wallydubbs » October 18th, 2020, 6:48 pm
by wallydubbs » October 18th, 2020, 6:48 pm
It's always good to get new eyes on another playtest. It didn't suit well with my girlfriend as she doesn't exactly know how to play the Wizard.
I have another friend that I introduced Hero Quest to, as she's been playing through a modified version of the Japanese quests (which I've changed to Solo quests). I've changed the story slightly to fit 1 character (she's playing as the Elf).
She's got 2 more quests to go through and I only see her once a month. When we get done we're expected to watch a season on Supernatural. But after that she'd probably be willing to play through this quest pack. But this would be months down the line before I could start making reports.
Lestodante, you've outdone yourself again, that is a fantastic cover. It's spectacular.
Rewards:
- wallydubbs
Halberdier- Posts: 1342
- Joined: October 18th, 2018, 7:15 am
- Forum Language: English (United States)
- Evil Sorcerer: Zargon
- Usergroups:
Who is online
Users browsing this forum: No registered users and 1 guest